
-
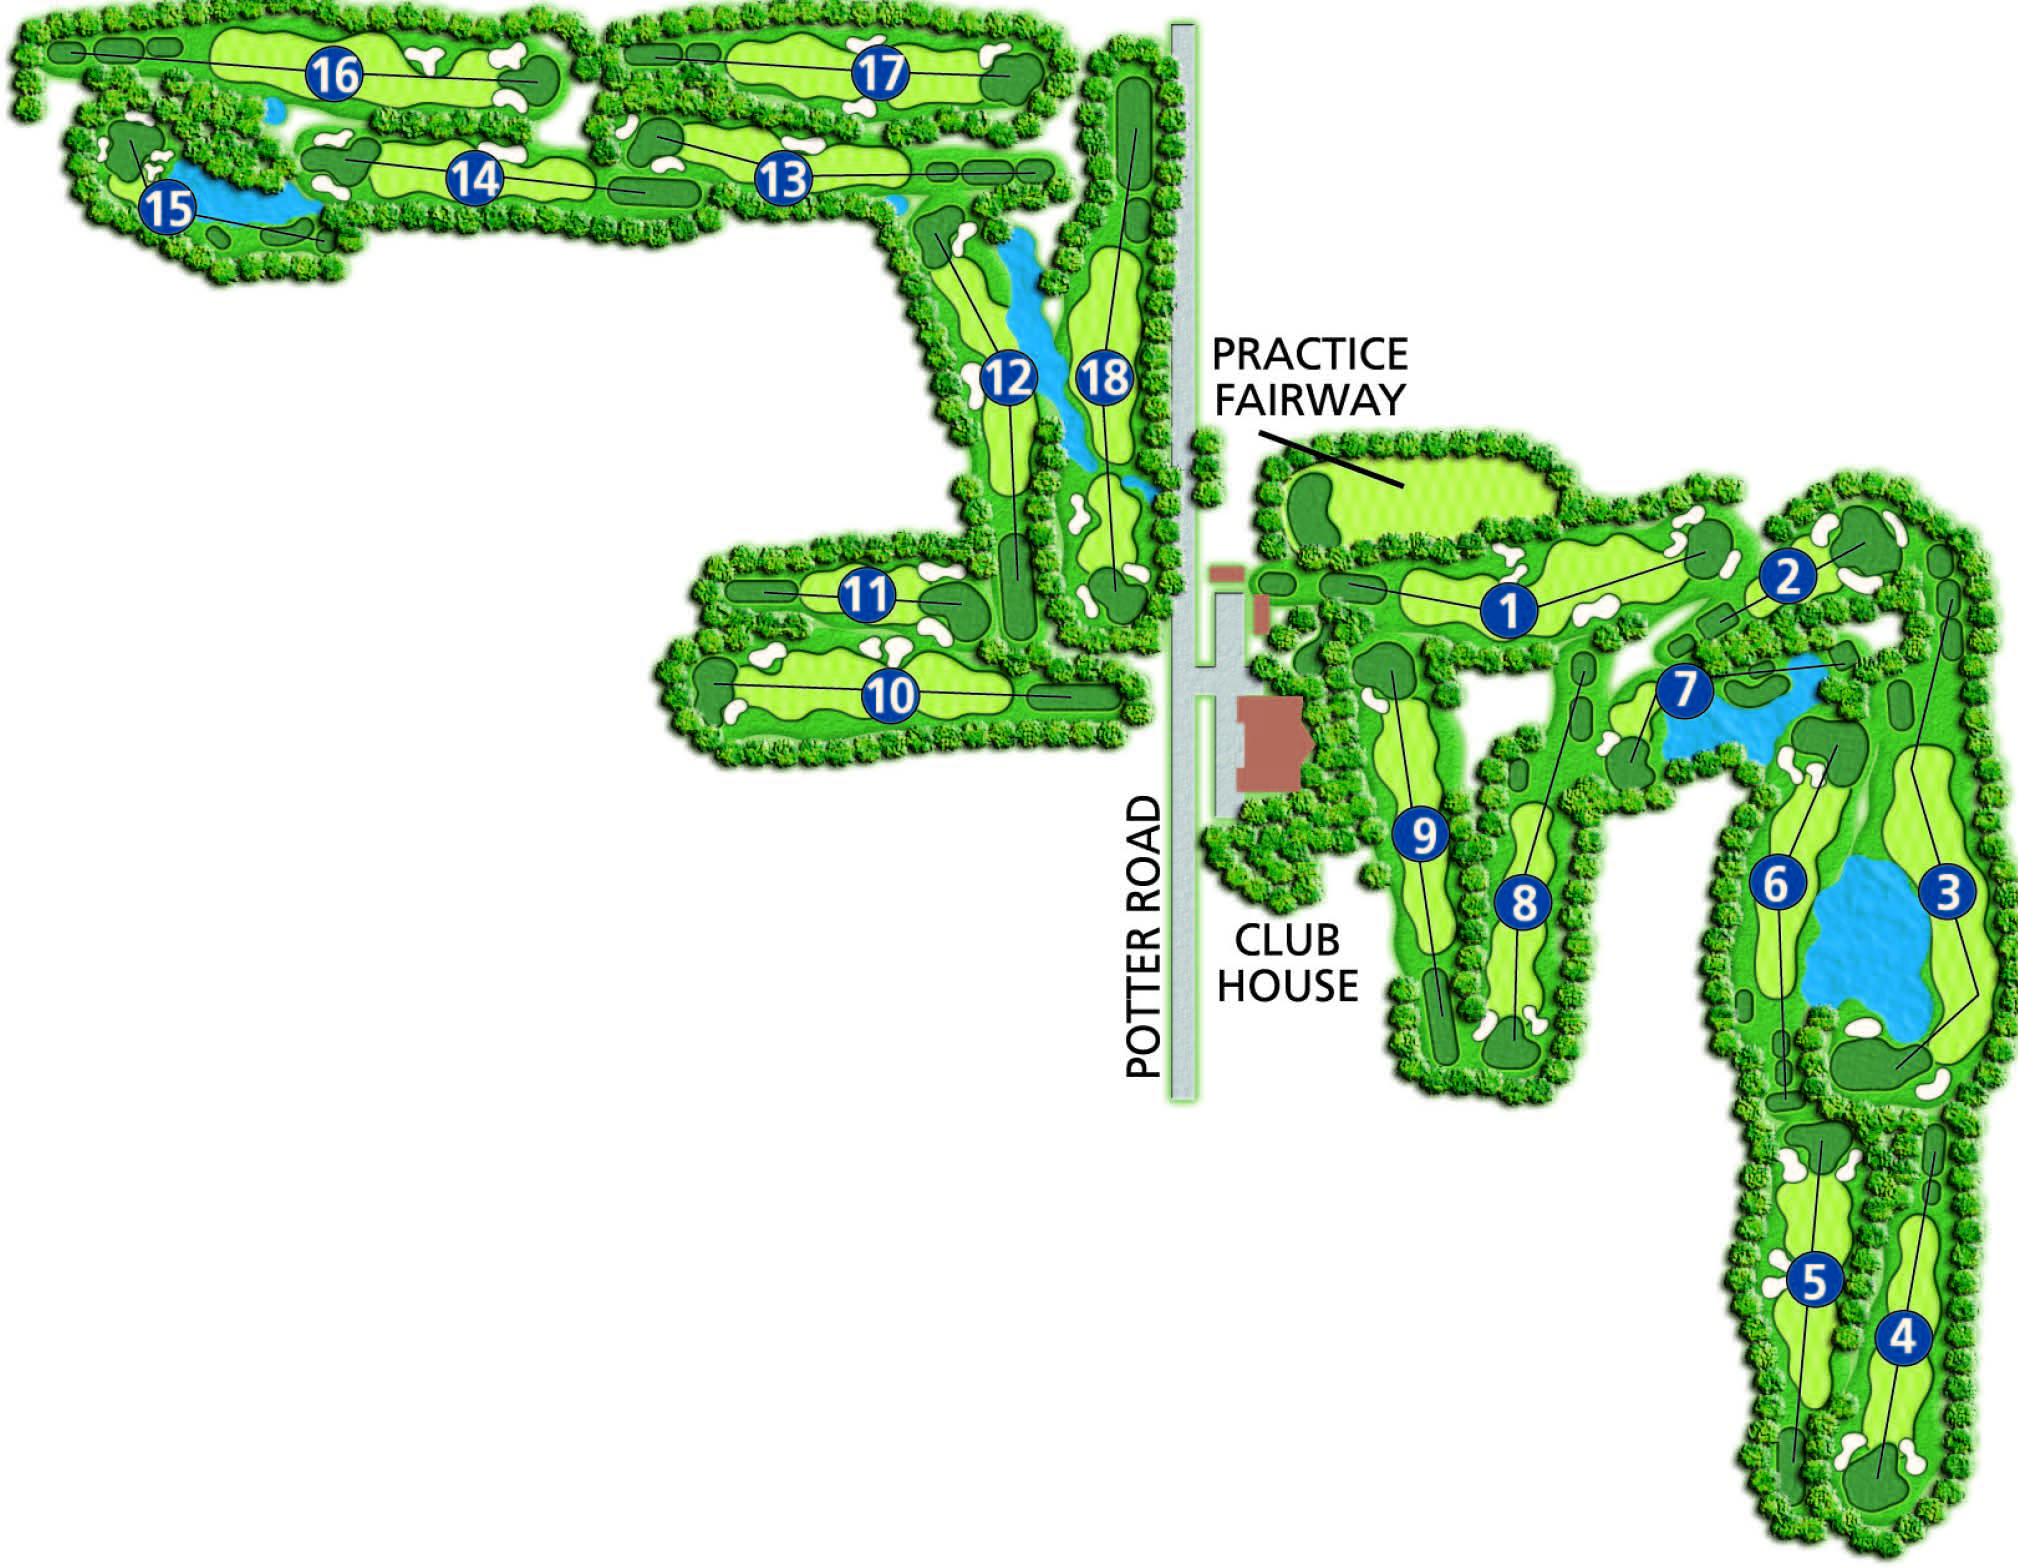
Main
USGA Rules Govern All Play
Local Rules- Out of bounds defined by white stakes
- Penalty Area defined by red stakes
- French Drains: Free drop (one club length)
- Stones in Traps; May be removed without penalty
- Drop area: Hole #7 - right side of cart path; Hole #15 - front of red tee
Course Rules- All players must sign in at Pro Shop
- Beverages must be purchased on club premises
- USGA recommended pace of play - 4:10
- Five minute maxiumum stop time at turn
- Anyone violating course or cart rules may lose their playing privileges
-
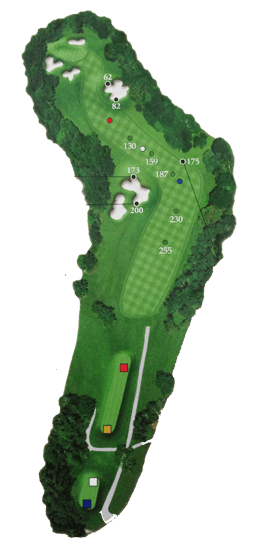
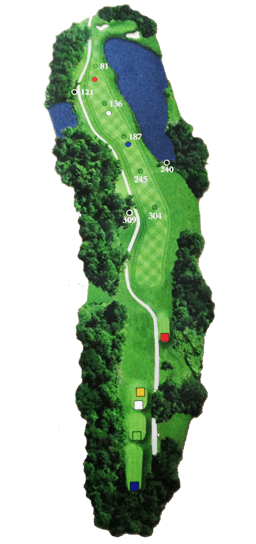
Hole #1
Step onto the first tee box at Radisson and you're in the spotlight! An elevated tee box points you to a generous fairway, with plenty of opportunities to get the day started with a good number. A short par 5, dogleg left. Place your tee shot to the right of the bunker and you'll have a 200 yard shot to the green.
Shorter hitters will have the opportunity to hit a short to mid iron for their second shot and still have a 100 yard shot into the green. You'll quickly get a feel for the generous use of bunkers in true Robert Trent Jones tradition. Plenty of fairway and the short yardage, gives excellent odds to starting your round with a par, birdie or eagle!
-
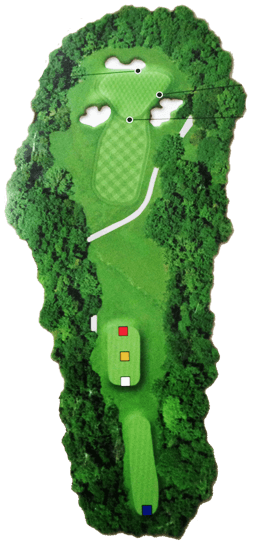
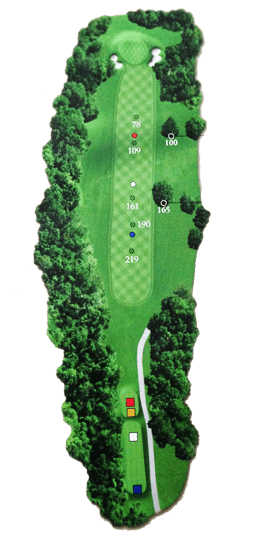
Hole #2
Hopefully you've taken advantage of the 1st hole sub-par opportunity. This par 3, playing anywhere from 139 to 216 yards, will require a good mid to long iron shot positioned somewhere near the days flag-stick location. With a huge green, surrounded by large, deep bunkers, you'll want to avoid being faced with a 60-80 foot putt. The pin can be tucked extreme right or left, behind the traps, forcing a well shaped shot if you want a good putt for birdie.
There are two separate tee boxes, with the upper box high above the green, providing a beautiful view of the hole and all it has to contend with.
-
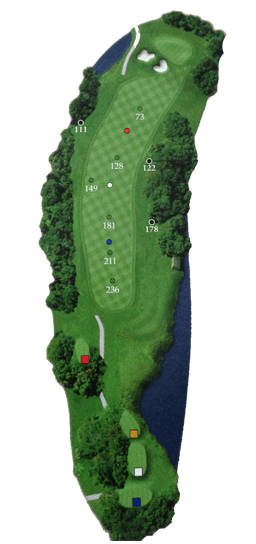
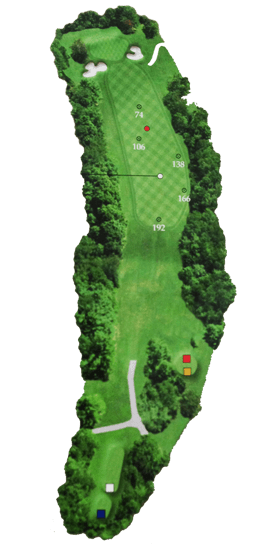
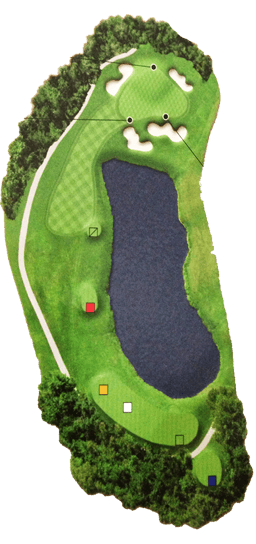
Hole #3
This spectacular hole will leave you with a sense of relief, or shaking your head. There is a lot going on here and little room for error. While a birdie opportunity awaits, the dreaded "other" can find it's way to your scorecard, if you stray.
A well placed drive will leave you with a fairway wood or mid to long iron for your second shot. There is a pond on both sides of the fairway, so accuracy is a must. Played as designed, you will have a short iron over the water, into the green. Don't bail out with a long shot in or you may find yourself in the woods behind the green or hung up in the high grass on a severe down slope. The green can be tricky when putting down hill. Touch and break may fool the first time visitor.
Walking off with a par or birdie, will always leave you with a smile!
-
Hole #4
This short par 4 provides a generous fairway with deep rough to the left and a large tree to the right for drives that miss the short grass. A very large green with a short iron in, gives a good chance for going after a birdie. Miss to the left and you'll be lucky to find your ball.
-

Hole #5
Hole 5 sets up to a blind green off the teebox. Two large bunkers guard the left side of the fairway. Bailing out to the right could find your ball behind a large tree, requiring a well shaped shot to hit the green. A solid draw, online, could clear the fairway bunker and gain a few extra yards as the fairway starts to fall downhill to the green. You'll be inside the 150 marker if you've cleared the trap.
The shorter hitters will need a solid fairway wood to get home. You'll want to avoid going too far left, as OB stakes aren't far from the treeline.
Your shot to the target is a visually pleasing look down, over the green. The typical Trent, huge green has plenty of undulation to test your lagging skills, if you shoot to the wrong quadrant for the days pin.
-
Hole #6
With one of the best views on the course, the 6th tee parallels the 3rd fairway and lake. You'll likely watch another group as they make their shot over the lake to the 3rd green. Once you settle into your strategy for the hole, you'll want to pay particular attention to avoiding the right side. A short drive right will have you blocked out by the trees and a long drive to the right, will have you in the trees and chipping out...if you can find your ball.
A well placed drive down the middle or slightly left, still requires an often long, soft shot to hold the firm green, which tends to send a good looking shot rolling across the green and off the back. The severe slop behind the green, combined with the tall rough, will test your shot making abilities.
A careless shot into the green can send you into the trees on the right or in the pond to the left. Best to exercise patience and pay attention on this hole. Par is a good score.
-
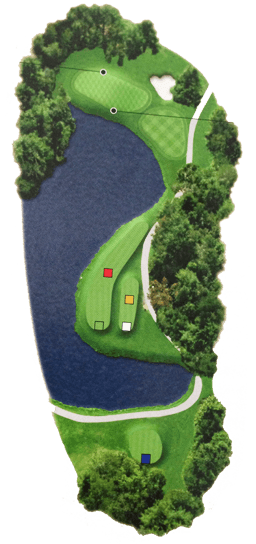
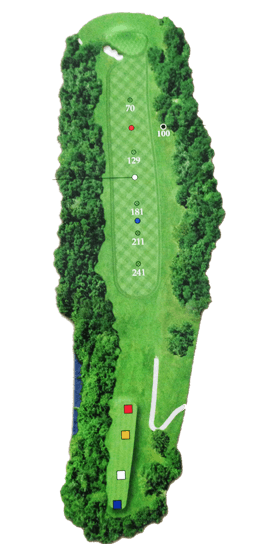
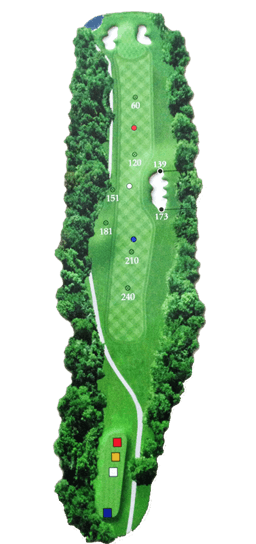
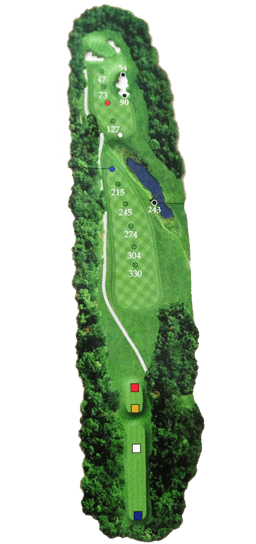
Hole #7
Picturesque, intimidating, wonderful hole! Whether you're on the red tees or pushed back to the tips, this par 3 will provide all the challenge of a great golf hole. Your target, a large, undulating green with numerous evil pin placements available to satisfy the greenkeepers mood for the day.
The shot requires full carry over water to the green, with a small slice of medium depth rough, between the front edge of the green and the hazard. While the green is usually receptive to stick the shot, finding the front quarter of the green often results in your ball spinning back and into the water. You'll have a great opportunity to pick up a birdie here, but with water in play, solid contact will be a must.
-
Hole #8
Hole 8 requires an accurate shot from the tee. The box is set well back and elevated from the surroundings, with intimidating trees to spoil an otherwise good drive if you borrow too much from either side. You'll need to carry a hidden valley to make the fairway or it will be a tough shot to reach the green in two.
Once you're past the trees, the fairway is really quite generous. A draw is the the preferred play to direct you down this slight dogleg left, yet there is fair room for a controlled fade.
The green has a prominent slope from back to front. The pin can be placed in some very treacherous positions, luring the bold or the foolish to a third shot from one of the deep sand bunkers. Center of the green is always a good choice here.
-
Hole #9
Heading toward the clubhouse is a long par 4. The tee box aligns pointing right, with trees hugging the left side of the box, suggesting a draw. The left side is a lateral hazard, with a steep drop off at the tree line. Faders will find the tee box more intimidating than those right to left players. Especially when playing the back tees.
One large bunker guards the left side of the very large green. If you find your ball on the far side of the pin, be prepared for a sneaky fast putt back to the hole.
-

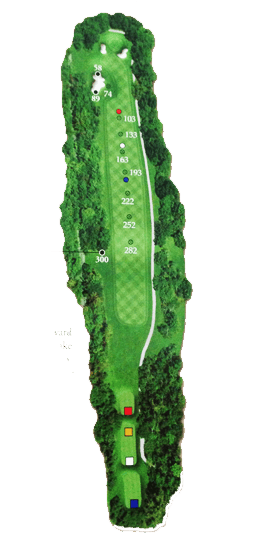
Hole #10
Hole 10 is the longest par 4 at Radisson. A straight, no nonsense hole. The narrow fairway is shared with a very large sand bunker on the right side. If you're not a long hitter, you can count on 3 shots to reach the green. A large bunker is placed short of the green, to the right to keep your lay-up shot in check and a large bunker protects the left side of the green. You'll want to get through here with a par or bogey and quietly move on.
-

Hole #11
A crisp mid to long iron should get you to this medium length par 3. Weak right will be swallowed up by the huge bunker guarding the front and right side of the green. Outside the bunkers are steep slopes making for tricky chips back onto the surface. A good opportunity to pick up a birdie, but par is a satisfying result.
-
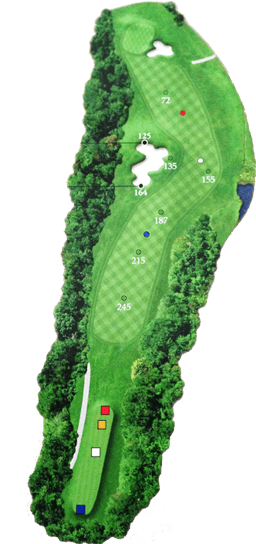
Hole #12
This dogleg left is one great hole! From the tee you are staring at a huge fairway bunker that is positioned right in front of you. There is plenty of fairway to the right, but errant shots can find the adjoining pond. A large bunker guards front, right of the sloping green. Trees and OB protect the left.
The undulating green can be set up with some nasty pin placements. Wonderful hole, with a beautiful view from the green.
-
Hole #13
A beautiful hole from the tee. You see a huge fairway bunker on the right, with plenty of landing room to the left. This long par 4, calls for a solid tee shot if you want to get home in two. The green is wide, with bunkers to the left and behind. You can roll the ball on, if you find yourself too far back to carry the shot in.
-
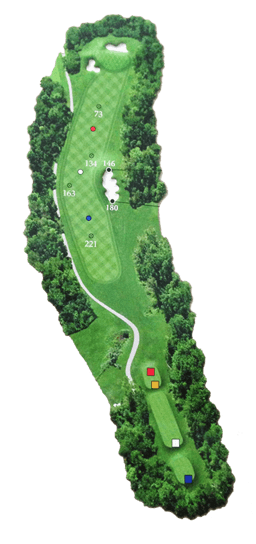
Hole #14
This short par 4 requires an accurate shot from the tee. One fairway bunker on the right, stretches both directions from the 150 marker, making for a very tight landing area. A fairway wood may be a good choice off the tee.
Your shot to the green should be carefully considered. With two large bunkers flanking both sides of the green, direction may be more important than making it all the way to the pin. A ball missed, landing in one of the bunkers can leave you with a very intimidating sand shot.
-
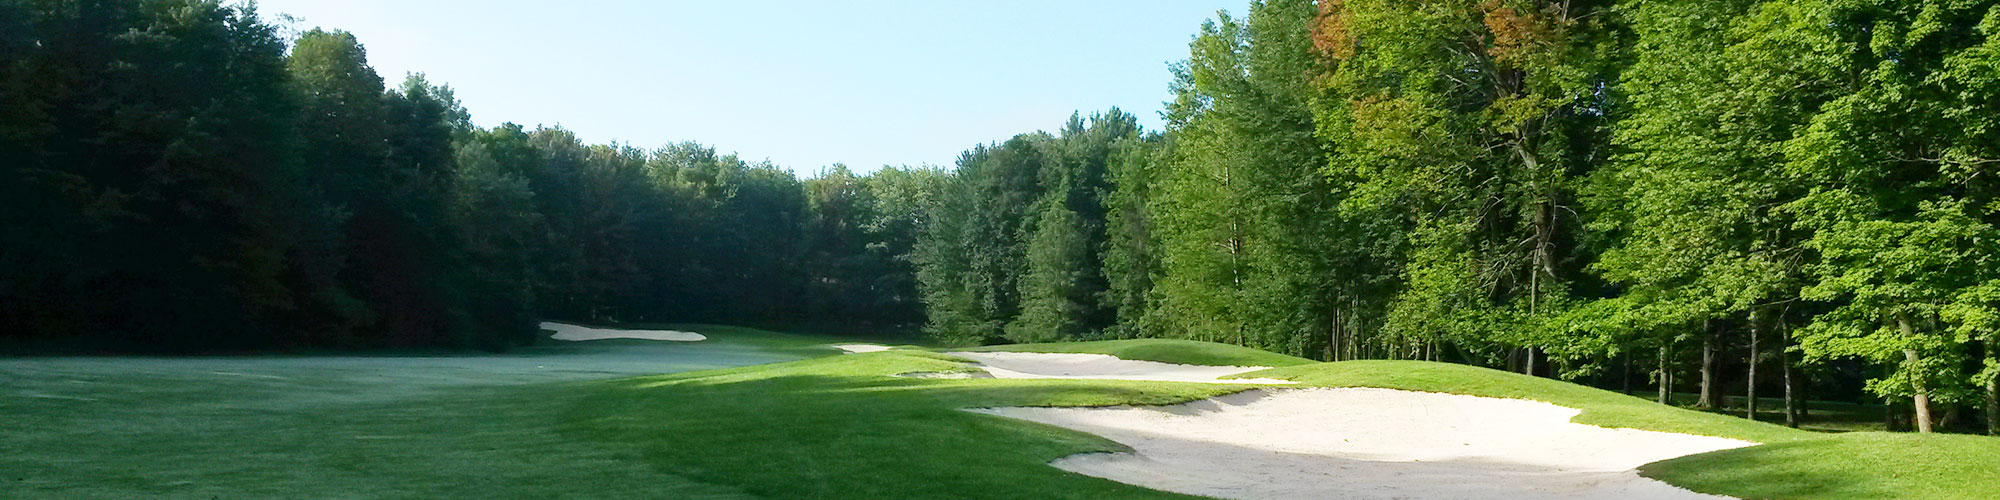
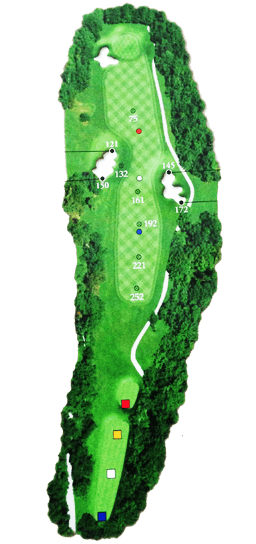
Hole #15
A truly great golf hole! Regardless of which teebox you're playing, this hole will get your attention. Water, sand and your target! Short enough to offer up a birdie. Ferocious enough to spoil your day! A hole to be savored and enjoyed!
-
Hole #16
Long and straight. Keep it on the fairway along this tree lined hole. One large fairway bunker on the left, narrows your landing area for the second shot if you try to get inside 100 yards. Two deep bunkers flank the front sides of the green. You'll want to have a short iron in your hands to increase the odds of hitting the smallest green on the course. Good opportunity for a birdie, but be careful how you read that putt. They can be easily misread here.
-
Hole #17
The final par 4 is a beautiful hole. Two sculptured bunkers narrow the fairway to a very small target, the farther out you place your drive. If you can clear the bunkers, you'll have a short iron in to a large green. If the pin is on the right side, place your shot well, to avoid a very difficult putt.
-
Hole #18
The finishing hole gives plenty of opportunity to close the round with a birdie, but equally opens the door to stumble and maybe fall prey to a last chance press from your opponent. A challenging par 5 gives plenty of room for the long ball off the tee, as long as you're straight. Drift left and your into the woods. Push right and you may find the pond that runs diagonally through the fairway.
A short drive will leave you facing a critical decision. Try to clear the pond in two, or lay up and have a 200 yard plus, shot into the green. Either way, once you take aim at the green you'll need to negotiate the large bunker blocking the left side and the large bunker behind the right side. The green is doubled tier, so finding the right level will increase your odds of making that final putt.